Kia Rio: Cylinder Head Assembly / CVVT & Camshaft
Description and operation
| Description |
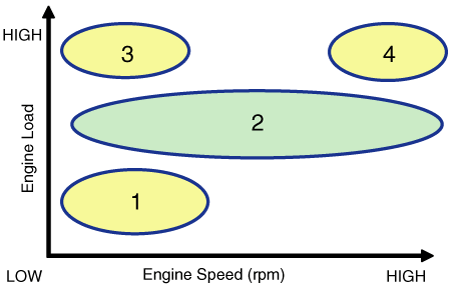
Continuous Variable Valve Timing (CVVT) system advances or retards the valve timing of the intake and exhaust valve in accordance with the ECM control signal which is calculated by the engine speed and load.
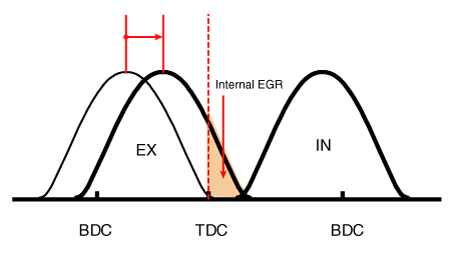
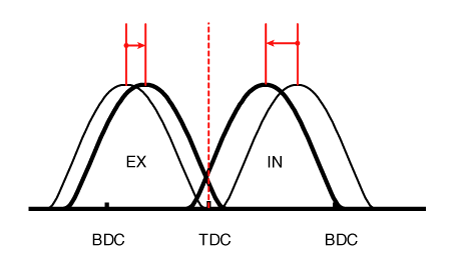
By controlling CVVT, the valve over-lap or under-lap occurs, which makes better fuel economy, reduces exhaust gases (NOx, HC) and improves engine performance through reduction of pumping loss, internal EGR effect, improvement of combustion stability, improvement of volumetric efficiency, and increased expansion work.
This system consists of
| – |
the CVVT Oil Control Valve (OCV) which supplies the engine oil to the cam phaser or runs out the engine oil from the cam phaser in accordance with the ECM PWM (Pulse With Modulation) control signal, |
| – |
the CVVT Oil Temperature Sensor (OTS) which measures the engine oil temperature, |
| – |
and the Cam Phaser which varies the cam phase by using the hydraulic force of the engine oil. |
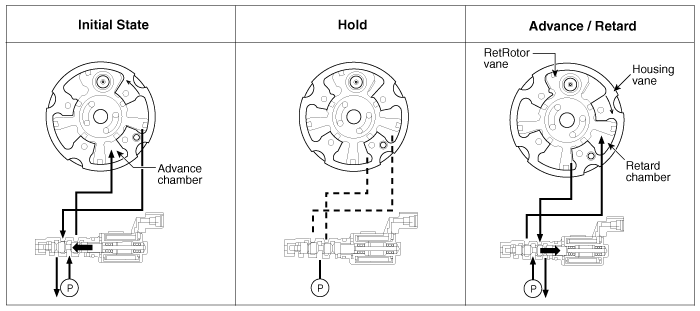
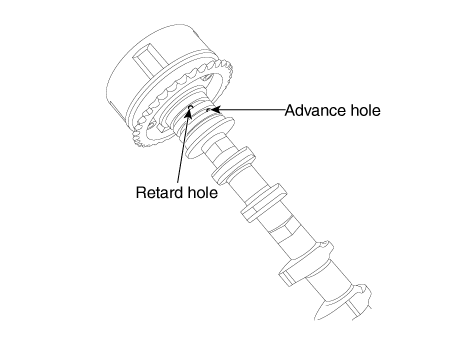
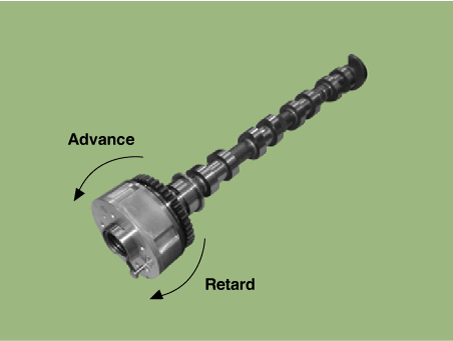
The engine oil released from the CVVT oil control valve varies the cam phase in the direction (Intake Advance/Exhaust Retard) or opposite direction (Intake Retard/Exhaust Advance) of the engine rotation by rotating the rotor connected with the camshaft inside the cam phaser.

| Operation Principle |
The CVVT has the mechanism of rotating the rotor vane with hydraulic force generated by the engine oil supplied to the advance or retard chamber in accordance with the CVVT oil control valve control.
| 1. |
Intake CVVT
|
| 2. |
Exhaust CVVT
|
| [CVVT System Mode] |
|
(1) Low Speed / Low Load |
(2) Partial Load |
|
|
|
|
(3) Low Speed / High Load |
(4) High Speed / High Load |
|
|
|
|
Driving Condition |
Exhaust Valve |
Intake Valve |
||
|
Valve Timing |
Effect |
Valve Timing |
Effect |
|
|
(1) Low Speed /Low Load |
Completely Advance |
* Valve Under-lap * Improvement of combustion stability |
Completely Retard |
* Valve Under-lap * Improvement of combustion stability |
|
(2) Part Load |
Retard |
* Increase of expansion work * Reduction of pumping loss * Reduction of HC |
Retard |
* Reduction of pumping loss |
|
(3) Low Speed /High Load |
Retard |
* Increase of expansion work |
Advance |
* Prevention of intake back flow (Improvement of volumetric efficiency)
|
|
(4) High Speed /High Load |
Advance |
* Reduction of pumping loss |
Retard |
* Improvement of volumetric efficiency |
Repair procedures
| Removal |
| 1. |
Remove the timing chain. (Refer to Timing System - "Timing Chain") |
| 2. |
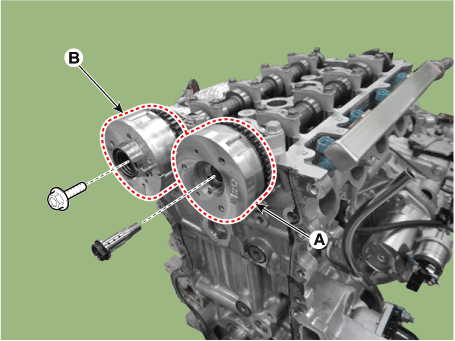
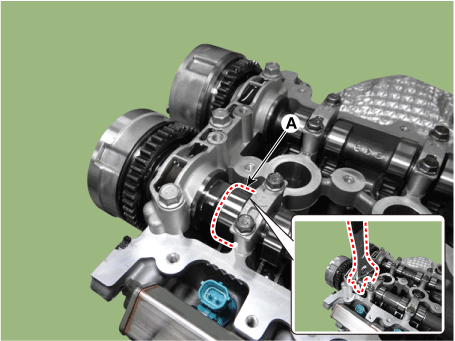
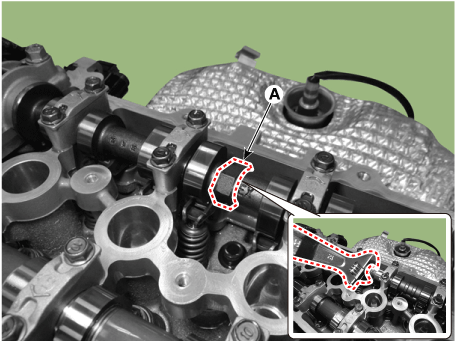
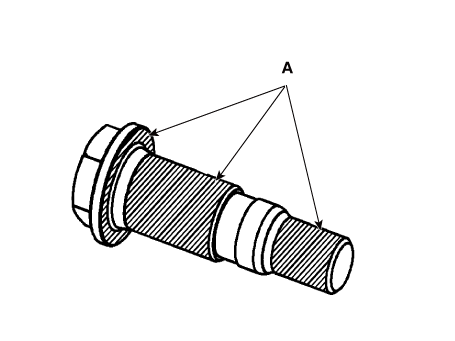
Remove the intake CVVT (A) and exhaust CVVT (B).
[Intake camshaft]
[Exhaust camshaft]
|
| 3. |
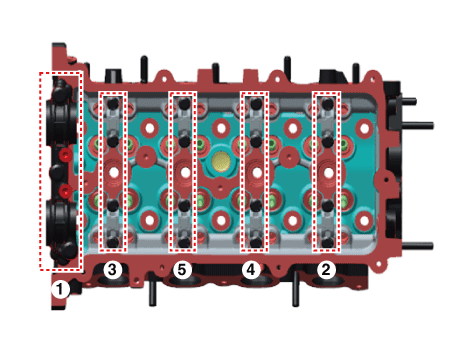
Remove the front camshaft bearing cap (A) and camshaft bearing cap (B).
|
| 4. |
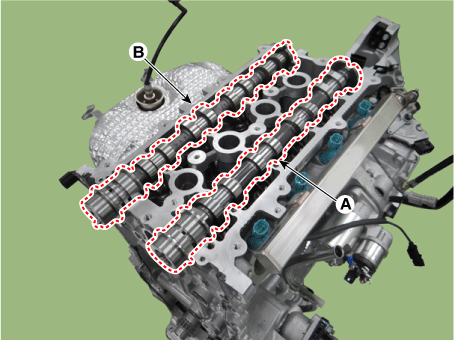
Remove the intake camshaft (A) and exhaust camshaft (B).
|
| Inspection |
Camshaft
| 1. |
Inspect cam lobes. Using a micrometer, measure the cam lobe height.
If the cam lobe height is less than standard, replace the camshaft. |
| 2. |
Check the surface of the camshaft journal for wear. If the journal is worn excessively, replace the camshaft. |
| 3. |
Inspect the camshaft journal clearance.
|
| 4. |
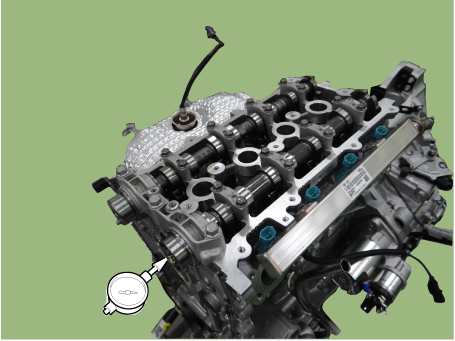
Inspect the camshaft end play.
|
Exhaust CVVT Assembly
| 1. |
Inspect CVVT assembly.
|
| Installation |
| 1. |
Install the intake camshaft (A) and exhaust camshaft (B).
|
| 2. |
Install the front camshaft bearing cap (A) and the camshaft bearing cap (B) as following method with specified torque.
|
| 3. |
Install the intake CVVT (A) and exhaust CVVT (B).
|
| 4. |
Install in the reverse order of removal. |
 Cylinder Head Cover
Components and components location
Components
1. Cylinder head cover
2. Cylider head cover gasket
Repair procedures
Removal
...
 Cylinder Head
Components and components location
Components
1. Cylinder head assembly
2. Cylinder head gasket
3. Swing arm
4. HLA(Hydraulic Lash Adjuster)
5. Retainer lock ...
Other information:
Kia Rio 2017-2025 YB Owners Manual: Cruise Control system
The cruise control system allows you to program the vehicle to maintain a constant speed without depressing the accelerator pedal. This system is designed to function above approximately 30 km/h (20 mph). If the cruise control system is left on (CRUISE indicator light in the instrument cluster ...
Kia Rio 2017-2025 YB Owners Manual: Armed stage
Using the smart key Park the vehicle and stop the engine. Arm the system as described below. 1.Turn off the engine. 2.Make sure that all doors (and liftgate) and the engine hood are closed and latched. 3.• Lock the doors by pressing the button of the front outside door handle with the smar ...


